If you have recently encountered the blue screen on your computer, we will show you some simple measures that you can take to solve the problem. Blue Screen Of Death or BSOD Or, as we usually call it, the blue screen of death, it is an error message displayed by Windows operating systems when the system encounters any software defect that may cause a condition known as system crash or System Crash, and often you cannot bypass it because it automatically causes a restart of the computer.
Fix blue screen issue
Fortunately, the blue screen of death has become very rare these days, but it is not impossible, as there are still some errors that may cause it to occur from time to time. Many users have reported encountering the blue screen of death issue right after upgrading to Windows 11.
Also read: For more articles, you can see how Install Windows 11 as a virtual system on VirtualBox.
Windows 11 has been around for more than a year now, and it works in a stable and completely stable state without any problems, and this means that the problem of the blue screen of death is an individual problem confined to some users.
Mostly, this problem can be permanently eliminated by adhering to some simple procedures, which we will get to know together shortly.
But if it persists and you are unable to get rid of it, you may have to reset Windows 11 from scratch, because it may be caused by damage to the code or files responsible for the normal operation of the system.
We hope that the situation will not lead you to reinstalling Windows from scratch, and therefore we recommend that you follow the procedures that we will show you through the lines of the following article in order to overcome it as quickly as possible.
1- Restart the computer
Yes, this is just a very simple solution, but as they sometimes say: “the simplest is often the best.” Certainly, encountering the blue screen of death automatically causes the computer to restart, but if the blue screen continues with an error message such as: CRITICAL_PROCESS_DIED And the computer stopped responding completely for a period of time, then you can restart the computer by long clicking on the power button on the computer case or laptop.
If the problem disappears on its own later, this is very good news, and it may have been caused by a glitch in some program files or the operating system was unable to properly understand the applications you installed recently and required a restart to start using external applications normally.
If the problem still appears after this, I recommend that you move on to the next procedures.
2- System Repair and solve the blue screen problem
Just like Windows 10, Windows 11 has some built-in maintenance settings that give you the ability to access some troubleshooting tools manually.
These settings may be all you need in order to solve the blue screen problem on the operating system. To access the system repair menu, turn on the computer normally, but while reloading the boot screen when the Windows logo appears, long-click the power button on the computer case or laptop to shut down the computer.
Now, re-execute the same previous step more than once until the operating system detects that there is a malfunction that requires entering the default system repair menu.
When you try to turn on the computer for the second or third time, the operating system will automatically try to load the Windows System Repair Tool automatically, and a “Please Wait” screen will appear asking you to wait a bit.
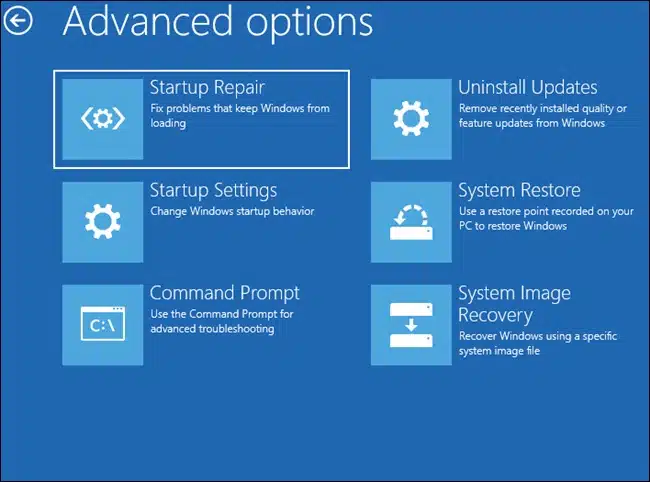
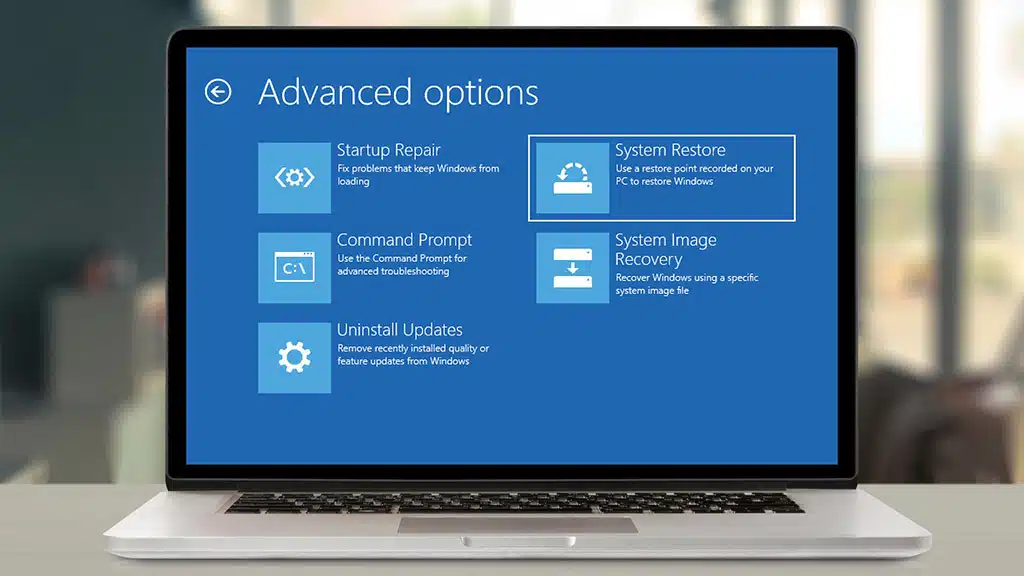
Once you enter the Automatic Repair screen, click on the “Advanced Options” tab from the bottom, then choose from the next screen the Troubleshoots option, and finally click on the Startup Repair option, and then the operating system will restart on its own and start trying to fix the problems that were found.
This tool should be able to troubleshoot problems automatically.
If the problem continues to appear with you from time to time, then this means that it still exists and I advise you to complete the following steps to get rid of it.
3- Run SFC Scan to scan system files
System File Checker gives Windows users the ability to automatically troubleshoot and repair corrupted files.
This step is ideal in many cases, including resolving a blue screen of death issue. You can run this tool via Command Prompt from the main graphical interface of the operating system.
But if you are unable to access the Windows graphical interface, you can still run it through the default Troubleshoots tool in the repair window - just as we explained in the previous paragraph.
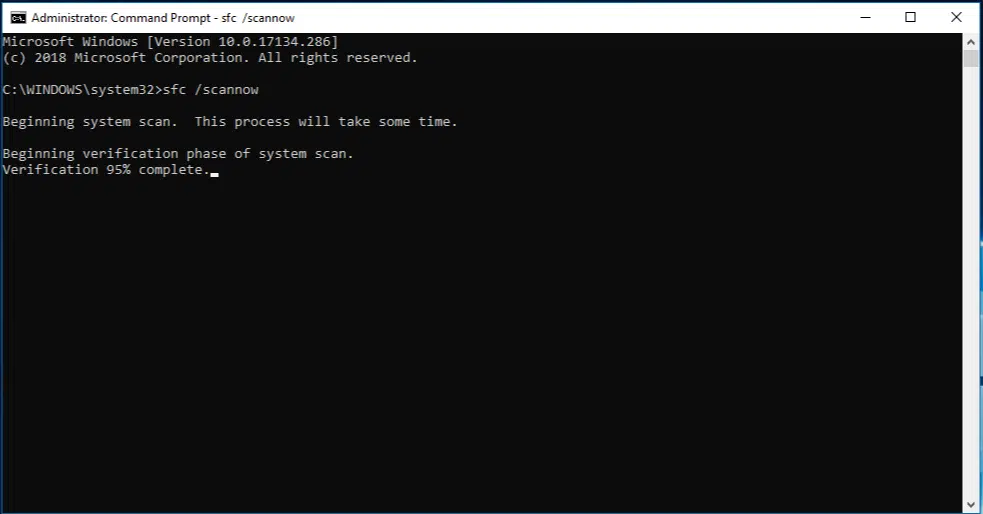
Once you enter the Automatic Repair menu, click from the bottom on the Advanced Options option, then choose the Troubleshoots option, then choose the Command Prompt option, and after the command prompt window opens, type the command SFC /scannow, then click the Enter key and wait a while, and then the operating system will try to fix all the interceptive problems, which from Among them is the blue screen of death problem.
Once the scan and repair process is completed, Windows 11 will automatically restart and try to enter the main Windows interface normally.
4- Delete recent updates that you installed recently

A group of human engineers are responsible for introducing new updates to the Windows system, and therefore they are sometimes exposed to making some mistakes as a result of not ensuring the compatibility and stability of updates with all devices and their various components.
If you notice that the problem of the blue screen of death began to appear after installing some new updates recently, it is best to remove these updates and wait for the updates that the company will introduce later.
To get rid of the latest updates, enter the Automatic Repair screen again, then click on the “Advanced Options” tab from the bottom, then choose from the following screen Uninstall Updates.
Then choose the “Uninstall Latest Quality Updates” option. This type of updates is periodic updates to provide some new features, improvements, or security patches to deal with new vulnerabilities and threats. However, these updates can cause some interception issues. Therefore, delete it.
If you are sure that the previous updates were important features, you better click on the “Uninstall Latest Features Updates” option.
Once you make your choice, Windows 11 will automatically restart and start removing new updates that were recently installed on your computer.
If the blue screen issue is caused by a technical error in recent updates, the problem should be fixed after removing the updates. But if the blue screen issue still appears, that means that it had nothing to do with the updates.
5- Enter Safe Boot mode
Safe Boot mode is a default boot methodology in Windows operating systems that requires minimal resources by using a very limited number of files and code essential to the system's workflow.
During this mode, you cannot run many third-party software and applications, to help you troubleshoot better.
If it turns out that the computer works properly in Safe Boot mode, this means that all Windows 11 drivers, instructions and operating files are completely intact and have nothing to do with the problem you are facing.
To enter the safe boot mode, enter the Automatic Repair menu, then click on the Advanced Options option, then choose the Troubleshoots option, then choose the Startup Settings option, and from the bottom click on the “Restart” tab, and as soon as the computer starts to restart itself, continue clicking Press the F4 key to enter secure boot mode.
Now the computer will restart in safe boot mode. Then open the Run menu by clicking on the shortcut Win + R and in the menu search bar type the word appwiz.cpl and then press the Enter key. Then the Programs and Applications window will open within the traditional Control Panel window.
On the left of the window, click the View Installed Updates option and remove any updates that you think could be the main culprit causing the blue screen issue.
At the same time, if you think that there are some suspicious programs or applications that you have recently installed on your computer, you can go back to the Installed Apps list and choose any application and remove it by selecting Uninstall.
This is an easy and straightforward way to properly troubleshoot and troubleshoot.
After you have finished removing updates and uninstalling suspicious software, restart your computer, and immediately Windows 11 will try to enter boot mode to access the normal graphical interface and exit secure boot mode.
6- Go back to the previous version of the drivers
If you have recently installed a new driver for any computer hardware and components, such as a graphics card, motherboard chip, or peripheral devices and peripherals such as USB flash drives, keyboards, web cameras, etc., then it may be the cause of the problem and the blue screen of death is encountered continuously. .
The good news is that Windows gives you the ability to roll back to a previous version of drivers when Windows was completely stable and working properly.
To return to the previous version of the software drivers for computer components, click on the Win + X shortcut and choose from the drop-down menu the Device Manager option, and then you should guess what drivers are causing the problem.
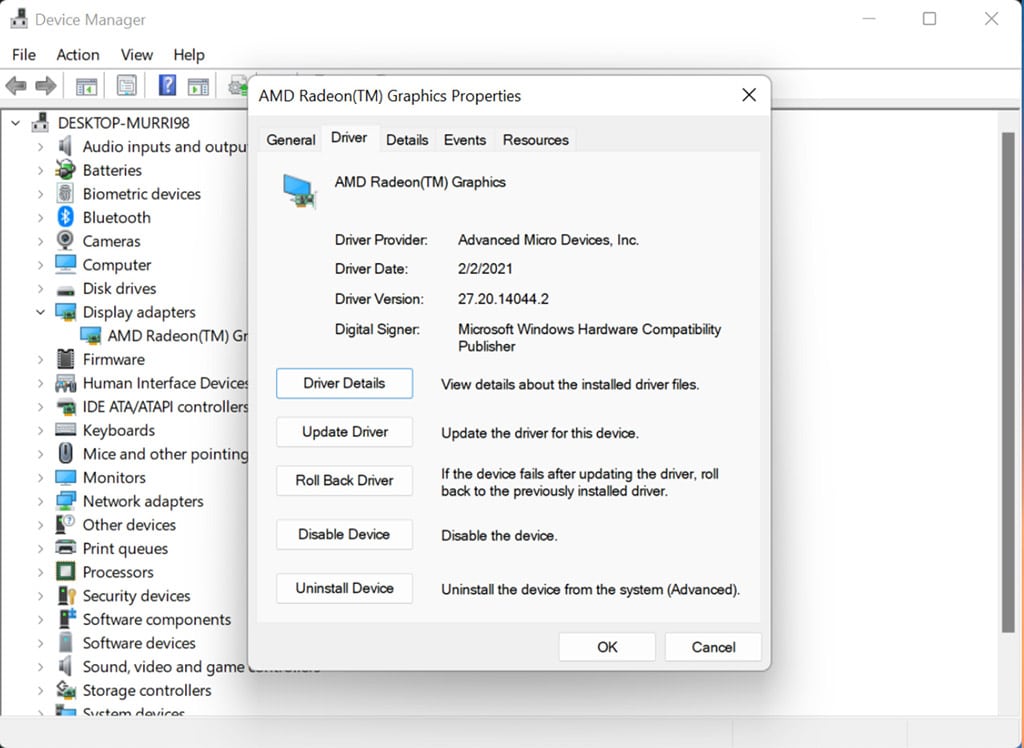
For example, if you think that the problem is caused by the definition of the screen card, then click on Display Adapter to expand the list, click on the name of the screen card with the right mouse button, and choose from the drop-down list the Properties option, then from the top click on the second tab, Driver.
Through this window, click on Roll Back Driver, and then the computer may restart, remove the last definition, and return to the previous definition. You should perform the same steps for any other drivers you have doubts about.
7- Disconnect any accessories that may be causing the problem
Windows 11 is a great and versatile operating system capable of supporting many peripherals and devices.
But in the end, nothing in this life is perfect. Bearing in mind that it is still a relatively new system, it may not be fully compatible with some peripherals such as keyboards, Bluetooth pieces, game consoles, external storage solutions, earphones, wireless network cards, and many other devices.
If Windows 11 is unable to recognize the devices that you have recently connected to the computer, this means that it is unable to find the basic files and drivers for these components, which results in a defect or error that causes the system to crash and face the blue screen of death problem.
In this case, you are forced to separate these pieces temporarily to check their order. If the problem disappears, you should look for a stable and stable definition that is compatible with the version of Windows 11 that you are using. But if you discover that there is no driver compatible with this piece yet, you have no choice but to replace it with another piece.
8- Rely on a System Restore Point
Windows 11 is capable of creating System Restore Points on its own but it is always better to create them manually.
But either way, it's best to try it yourself. Through a system restore point you can go back to an old state of the operating system when it was working properly without any errors.
Caution: You must take this step as soon as you encounter the problem because Windows creates automatic restore points every few days.
To return to an old state from a system restore point, enter the Automatic Repair screen again, choose the Troubleshoot option, then click the System Restore option, and from the next screen, click Choose The Latest Restore Point and click the “Next” tab, and then Windows 11 will begin to restore its state They are based on the date the restore point was created.
Once completed, the operating system will automatically restart itself and the blue screen of death problem may be permanently fixed.
Reset the device again
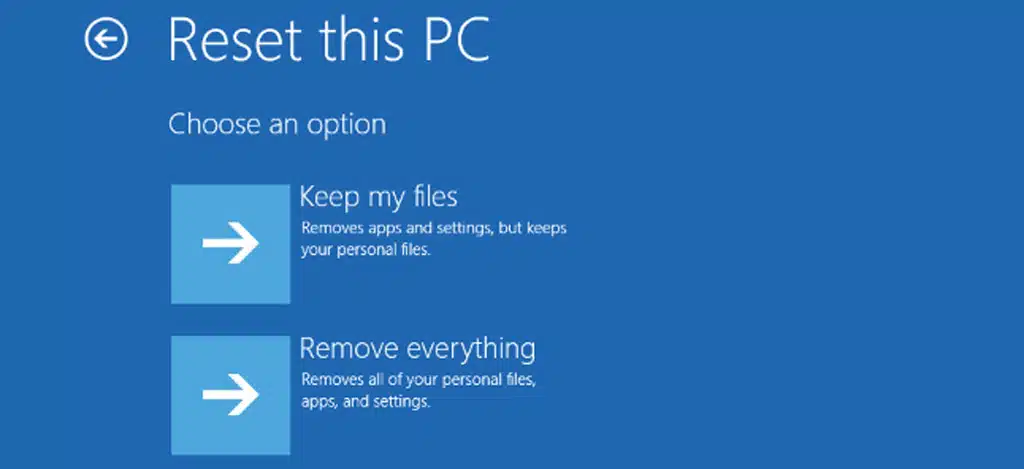
Windows 11 contains an amazing setting known as Reset or Reset PC, a feature that has been present since Windows 10, which is considered to be the device’s return to its default state – just like the factory setting on smartphones – through which all files and instructions located in the C partition are deleted And all files associated with Windows, but it does not delete any personal data from other storage partitions.
Just remember that the Reset PC process will delete any files on your desktop or in the Downloads folder, so you should back up this data before starting the process.
Now go to Automatic Repair screen and choose Troubleshoots then click on Reset PC option and in the next window choose Keep My Files and wait a few moments.
Then Windows 11 will start to reformat itself by deleting all previous Windows files that may be causing the problem and reinstalling itself again.
You can also see how Factory reset Android And restore the default settings of the phone to solve most of the problems of the device.
Install Windows 11 from scratch
We hope you managed to get rid of the blue screen of death issue with the previous procedures. But if all your attempts fail, unfortunately, you are left with nothing but the “nuclear solution” and reinstalling Windows 11 from scratch.
But despite that, after installing Windows, you should make sure that you install all the drivers that are compatible with the exact components of your device and with the exact version of Windows that you are using. Also, it is imperative not to install any suspicious third-party apps or programs.
Conclusion
These were all the possible solutions that we can share with you in order to overcome BSOD problem in Windows 11.
We hope that you will be able to get rid of this age-old problem and we guarantee you that any of the previous proposed solutions are actually capable of fixing this problem since they are built-in default fixes recommended by Microsoft.
But if the problem continues to appear even though I am sure that your device has the best and correct updates even after resetting Windows 11 from scratch, then the problem may be caused by a technical failure in the hardware components such as RAM or storage disks, or perhaps as a result of an excessive rise in temperature Motherboard, graphics card, or central processor. Therefore, take all possibilities into account in order to eventually come to a positive solution.