How do I change the mobile line? This is a common question for smartphone users. One of the best things about Android is how customizable it is. Android phones allow you to customize them as you want in order to improve the experience and express yourself properly.
Changing fonts for Android seems like a logical extension of this philosophy, although it's not always as obvious as you'd expect, but the good news is that where there's a will, there's a way!
Read on to learn how to change the writing font on your smartphone, whether it's a Samsung, Xiaomi, or any other Android phone.
Change font without programc
Although some smartphones do not support the feature of changing the font without software, some companies have adapted their systems to support this much-needed feature. Companies like Samsung, Xiaomi, Oppo as well as Realme and others have made it easy to change fonts for Android.
The process may change depending on your phone, but you can usually find this option in Settings, usually in the Display section. From there you can change the actual font, as well as the font size.
For example, almost all Samsung devices allow you to change the font style. Samsung pre-installed a few extra fonts besides the default fonts, but you can get more online through the Galaxy Store (both free and paid).
Read also: Samsung phone update A detailed explanation of how to update the operating system on Samsung Galaxy phones.
Changing the font on the phone and adjusting the size (Samsung phones)
You can change the writing font in your smartphone (Samsung) by going to Settings > Display > Font size and style.
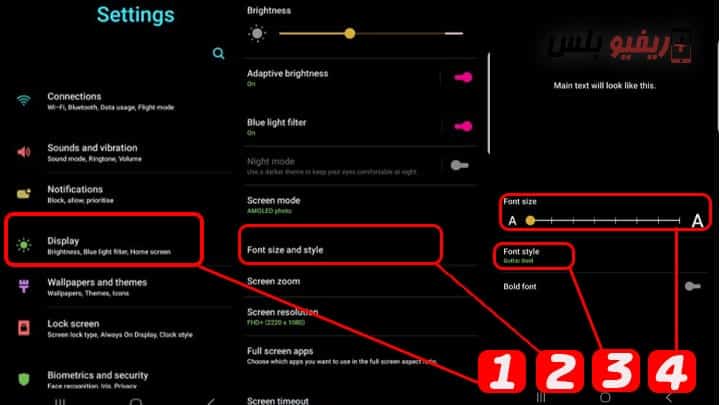
Simply click on the name of the font you want and confirm that you want to set it as the system font. Font replacement is generally a quick process; No need to restart the phone afterwards. The selected font will be displayed across your device's interface such as the time in the status bar, system menus, and even in text messages.
Applications to change the font and the form of writing on the phone (Launchers)
If you can't change your font system-wide, a useful trick to change fonts for Android is to install a custom launcher.
This will replace your home screen and will often be able to affect other UI elements in the system as well.
By customizing your fonts in this way, you will change the way your device looks most of the time.
Failing that, there are some apps that let you change fonts manually for Android. We'll discover the best options for doing that below.
1- Apex Launcher app
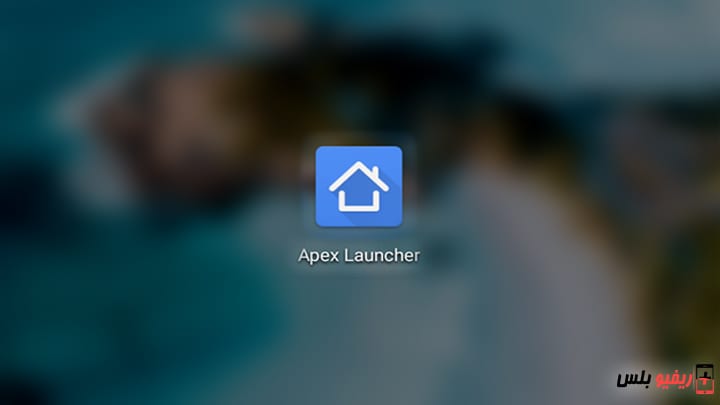
One of the most popular launchers is Apex Launcher. Here's how to change the fonts on your phone's home screen after downloading and installing the app. Keep in mind that this will only change fonts within the launcher itself and that the app is rather expensive.
- Go to Apex Launcher Settings.
- Click on "Home screen".
- Click on the “Layout and Style” option.
- Finally, click on Select Label Font and choose the font you want to use for your home screen.
Finally, you can change the font on your phone this way using Apex Launcher:
- Go to Settings again through the app.
- Click on select “Folder”.
- Finally, scroll down and tap on the Label Font selection and choose the font you want to use for your folder.
You can download it from here
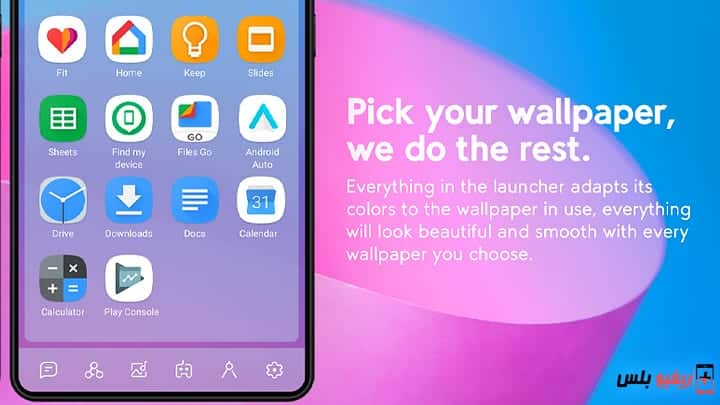
2- GO Launcher app
GO Launcher is a launcher aimed specifically at users who want to customize their phones. That includes changing fonts. To change font styles in GO Launcher, do the following:
- Copy TTF or OTF font files to your phone.
- Long press anywhere on the home screen and select GO Settings.
- Choose Font > Select Font.
- Choose your font, or click Scan to add the files stored on your device.
This won't change fonts system-wide, but it will change them across the app, which will include most menus and apps you'll interact with regularly.
You can download Go Launcher from here here
3- Action Launcher

Another powerful launcher when it comes to Android customization is Action Launcher: Pixel Edition. To change the font with Action Launcher, head to Settings and then choose Appearance > Font. Now choose the font you want. You won't have a whole lot of options here, just system fonts and a few variations, but it's still better than nothing!
- Go to Action Launcher settings.
- Head to Appearance > Font.
- Pick a font you want to use and you're done.
You can download Action Launcher from here here
4- Smart Launcher To change the writing line and modify the mobile themes
Smart Launcher 5 is another launcher that lets you define new fonts for Android. This time, you'll head to Settings and then select Appearance > Font.
There's a pretty good selection of fonts available in Smart Launcher, which is great for fonts that really want to express themselves. It is not good that changing back will only affect the fonts in the application.
- Go to Smart Launcher 5 settings.
- Head to Appearance > Font.
- Pick a font you want to use and you're done.
You can download Smart Launcher 5 from here here
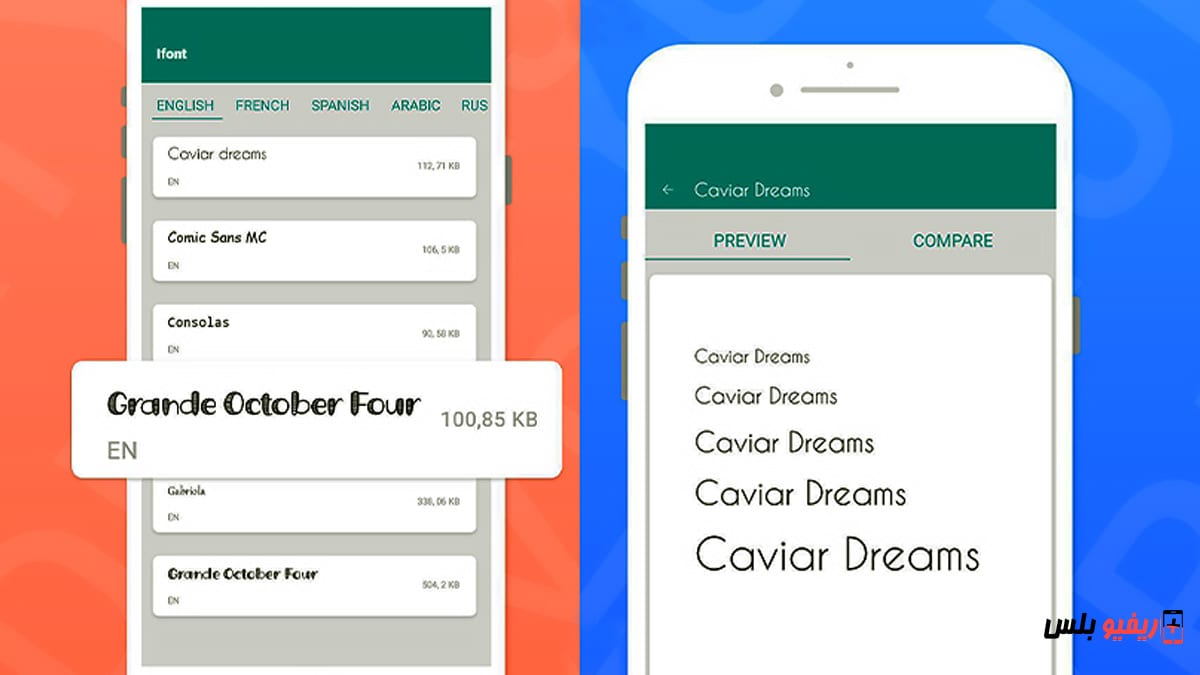
5- Change the font style on the phone via iFont
iFont is not a launcher, but an application specifically used to change fonts for the operating system (Android).
The iFont program to change the font on the phone is completely free and supports many mobile phones such as Samsung, Xiaomi, Oppo, Huawei, HTC, Sony, Motorola and others.
On non-rooted devices, use the iFont tab online to browse available fonts. To use a font in the list, do the following:
Steps to change the font size and type for Android phones using the iFont app
Enable the installation of applications from "unknown sources". This option can usually be found in Settings > Security.
Launch iFont and go to the "RECOM" or "FIND" tabs to find the fonts.
Click on the name of the font you want to install.
Click on the “Download” button.
Click the "Set" button to install the font.
Go to Settings > Display > Font size and style. The newly installed font should appear in the list.
Click on the new font to use it as the system font.
Click on the new font to use it as the system font.
The line is applied instantly. No need to restart.
You can also copy TrueType (TTF) fonts from your computer to the /sdcard/ifont/custom directory; The fonts will then appear in a Custom Tab. But in order to be able to install and use the fonts, you will need a rooted device.
Unfortunately, the trade-off is that Samsung One UI doesn't seem to support iFont anymore. Therefore, you may find that the newer Samsung devices are not working. But there is an alternative, and it's called Wings Samsung Fonts.
Download iFont from here
Although many people would be happy to stick with the default Android fonts, the ability to customize them is a great option for those who like to customize their gadgets.
This flexibility is part of the appeal of Android. The good news is that no matter what kind of device you own, there should be a way to set your font. And now you know how to get started!
Those who are more tech-savvy can change fonts manually on modded devices using the Android Debug Bridge (ADB), among other options, but we won't go into detail on how to do that in this article.
So, have you changed your Android fonts to something else? Let us know it in the comments below!